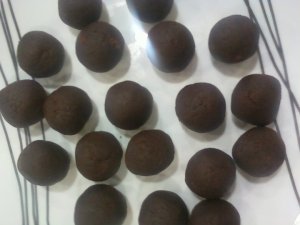
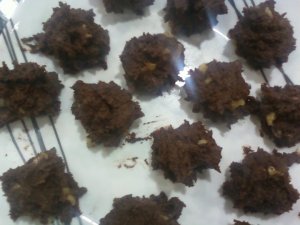
May 14, 2010
On moving locations.
For the few of you who have been checking back here, I know I haven’t been updatings. However, I just established a new blog at http://lovingsweets.wordpress.com/
I hope you guys update your links or feeds and start following me there! I will be periodically transferring my posts from here onto there (with only slight edits).
I’m planning some fun things for my new site, such as “Monday Rants” so I hope you join me over there.
Thank you, and goodnight.
April 13, 2010
On a quick, delicious, and convenient lunch/dinner recipe.
Seriously. Your average on the go mom (or on the go student, like me) can do this.
My school schedule is such that I’m in school from the afternoon until night. I usually don’t eat before I leave the house, so by 3 I get really hungry. I don’t like buying food from school. Last time I got a sandwich from the coffee shop the list of ingredient was over 2 inches long, in tiny font. Scary, right? So I like to make my own lunches. Problem is, morning before class is when I get all my work done, go to the gym, etc. Even though class starts at 1, I’m almost always rushing to get out of the house.
Conclusion? I like food that’s quick and easy to assemble. I don’t want it to be prepackaged processed food. I’ve come up with several easy meals that can be taken with me, and here is one of my favorites:
First lets talk about what you’ll need. I usually have chicken breasts frozen in the freezer. They sell them in bags at costco, but you can also buy packs from the meat section of your market or at the butcher’s. Just freeze the cuts of chicken separately, that way you can defrost just one if that’s what you need. You’ll also need some spices, or just salt and pepper if you don’t have anything more interesting.
You’ll also need spinach. Of course, fresh, steamed spinach is the best. But lets be honest here: most of the time you’re not going to want to sit there and steam spinach. Also, fresh spinach gets wilted and gross pretty quickly. So for someone like me, who doesn’t buy groceries too often, that’s quite inconvenient. Instead, you can buy frozen spinach. I used the chopped kind for tonight’s dinner.
Lastly, feta cheese. I buy the big containers of feta, and they haven’t as of yet gone bad before I’ve finished it. But I probably eat more feta than your average person. In any case, it doesn’t go bad as quickly as other cheeses.
Lastly, bread. I have these awesome thin bagels that happen to be my favorite bread right now. Any bread will do really.
Okay, ready for some Spinach, Chicken, and Feta Wrap?
-1 Chicken Breast, frozen
-Spices for chicken
-1 cup Spinach, fresh & steamed, or frozen
-1/2 cup Feta
-Optional: A few slices tomato
-1 tortilla
1. In the microwave, defrost the chicken. I usually nuke on defrost (or 50% power) for 2 minutes. Season with seasoning of choice. I used a grilling spice mix usually used on steak. Salt and Pepper would work too.
2. In a non-stick skillet (lubricated, of course) on medium heat, cook chicken for about 2 minutes on each side. Remember that this might vary depending on the heat and thickness of the chicken. Once cooked all the way though, use two forks to shred the chicken. Do this by holding the chicken in place with one fork, and pulling at it with the other fork. If using frozen shredded spinach, throw it into the pan when the chicken is almost done to defrost it. In a bowl, mix the chicken and spinach together with the feta
3. Place tortilla on the skillet and let it grill for about a minute. Remove it from heat and assemble your wrap by adding the filing to the center of the tortilla, adding fresh tomato (optional) and rolling.
I wrap it in a paper towel, then foil over that, and put it in a paper bag. Usually the one wrap is enough for me, but sometimes I’ll throw in a ziplock full of fresh cut veggies if I happen to have any in the fridge.
You can take this with you to work or school. Its easy to prep the night before, or even in the morning if you have 20 extra minutes. I usually make multiple servings of the filling and keep it either in the fridge or freezer for later. That way if I’m stuck on what to take with me to school I can defrost the filling in the microwave and make a quick wrap in 5 minutes.
April 9, 2010
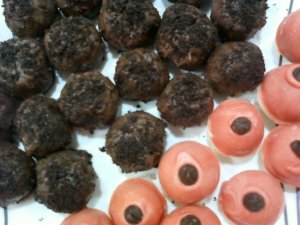
On Oreo Cheesecake truffles.
On, around, near, and ALL OVER these gosh darn truffles. I have a serious food crush on these things.
It’s another recipe inspired by Recipe Rhapsody. I’m not sure if she got it from somewhere else or if she invented it herself. All I have to say is that if she imagined these up herself, she sure deserves an award. They’re DELICIOUS.
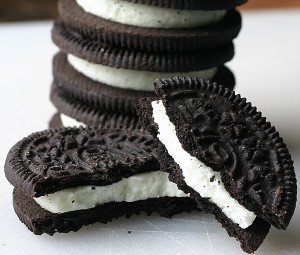
I found this recipe while browsing her archives, and immediately knew I had something magical in front of me. First of all, I can’t resist a bite-sized anything. If you’ve been reading regularly, you probably know that already. Secondly, while I’m not a big fan of eating oreo cookies plain, oreos are a dessert-lover’s dream.
Oreo flavored things are delicous. Actually, delicious doesn’t cover it. Have you ever seen the commercials for Philadelphia Cream cheese circa 2007? You know, where they’re all in heaven? That’s how putting oreos in my dessert makes me feel.
You got philly in my oreo! You got oreo in my philly! Mmmmmmm.
The only changes I made to the recipe she gave was to add 1/2 cup confectioner’s sugar, and to call them “Oreo Cheescake Truffles”, as opposed to simply “Oreo Truffles”.
I added the sugar because when I whipped up the batter without it, I couldn’t appreciate the truffles as a new creation. By that I mean that when combining ingredients to make something new, I want the product to stand on its own as a brand new creation; better than the sum of its parts. The recipe without the sugar felt like eating oreo and cream cheese rather than an Oreo Cheesecake truffle. Adding the confectioner’s sugar changed it all. Suddenly I was eating a little bite of cheesecake, and it was wonderful. A love affair was born.
Fine. You guys can make it too. I’ll try not to get jealous.
1 package (1 lb. 2 oz) Oreo cookies
1 package (8 oz) cream cheese, softened
1/2 cup confectioner’s sugar
Chocolate for coating. We’ll talk about this later.*
1. Pour cookies into your food processor. Veronica at Recipe Rhapsody warned that if you use all the cookies, you’ll end up with about 1 cup too much. I don’t mind that so much since I just kept the extra in a plastic bag for later. I’m always looking for things that are more interesting than sprinkles. If you’re bothered by the prospect of leftover crushed oreo, then set about 8-10 aside and eat them later. Run food processor until oreos are ground very fine.
2. Pour 3 cups ground oreo into a mixing bowl, and add in softened cream cheese and confectioner’s sugar. Mix with you hands. This will get messy–get over it. Use gloves if you can’t handle it.
3. Coat. Sprinkle leftover ground oreo over truffles.
4. Enjoy.
5. Enjoy again.
6. Stop. Control yourself.
7. Okay, just one more.
Sigh. These are seriously amazing.
*Its later. Lets talk about coating. A few days ago I wrote about coating using real chocolate. I said that I didn’t know what chocolate candy coating was, and didn’t find it necessary. Well, kids, this time I tried using chocolate candy coating. I bought dark cocoa Wilton Candy Melts® at my nearest craft store to see what would happen.
Here’s what I learned. Candy Melts® do indeed melt better. They stay melted well in bowls with any specific heat. They don’t harden too quickly, which is great because you don’t have to keep nuking your chocolate, but also makes it near impossible to roll the chocolates around in sprinkles or whatever topping you’re using. If you want a topping on the chocolate and you’re using candy coating, you must sprinkle them over the truffles, not roll the truffles in them.
I also learned that candy coating doesn’t taste as good as real chocolate. It might have been this brand. Most recipes call for something called “bark candy coating,” but I couldn’t find it anywhere. It may very well taste better. If you have it, go ahead and taste it. It might be tasty.
However, if your coating chocolate doesn’t taste great you’re going to have to ask yourself: what is more important; ease or quality? Normally, I’d say try to find somewhere in the middle, but this is an either/or kind of situation. So what will I do? I’ll be using real chocolate. My kitchen is the only place in my life where I happily work extra hard to make something better. That being said, it is good to know that this other chocolate stuff exists for times when I’m really rushing.
Last thing I want to share: I used my normal method with this new chocolate: roll truffle around in chocolate using two forks, and then place truffle only one fork and let most of the excess drip off.
April 8, 2010
On merging food with visual arts.
A friend of mine recently introduced me to toxel.com, which is a fabulous website for killing time and general miscellaneous entertainment. A few weeks ago I shared with you guys a link to weburbanist.com. This is similar, but organized in a very different way, and I love it.
Today I opened up my RSS feeder and was thrilled to see that toxel had a new post up, and it was about cake! Have you ever watched Ace of Cakes on the food network? These cakes are like those from Charm City Cakes (which, in case you didn’t know, is the bakery that Ace of Cakes showcases). Check it out:

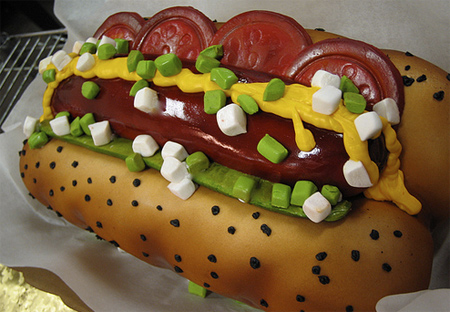
You can see the rest of the cake post here.
If you enjoyed that, maybe you’ll also enjoy this post, which is about food art creations.


I love food when it tastes good. But you know what I love even more? When it looks good too! Next time you’re making yourself dinner and have extra time to spare, try arranging your food the way the do on food competition shows; somehow your food will taste better. Presentation is 5 points, after all.
April 5, 2010
On grilled cheese: that which I love more than Gerard Butler.
I love grilled cheese. I love all kinds of grilled cheese. Sometimes I dip it in ketchup or tomato soup, and sometimes I like it with tomato and avocado on the side. If the grilled cheese is particularly fantastic, I’ll forgo anything but the sandwich itself, in order to retain the purity of the flavor.

The classic: white bread + american cheese. This pairs well with tomato soup.
Sometimes I like to make grilled cheese in a pan, and sometimes I opt for a panini press. I even have one of those sandwich grilling things that separate the sandwich into two triangles (I love this piece of equipment. It’s fabulous). Pans and presses are fantastic when there is more than just cheese in there, but when the sandwich is simply bread and cheese, the triangle one is ideal. It allows the cheese to pool and ooze in a beautiful, almost poetic way.
Here’s a little Haiku for you, oh grilled cheese, for you are truly the most perfect sandwich in existence.
I love you, grilled cheese
Oozing, cheesy, delighful
I’d die without you.
I’m going to attend the 1st 8th Annual Grilled Cheese Invitational, now who’s with me? Tickets are $10 plus $2.40 processing fee. Make sure you sign up to judge. I’m so excited!
April 4, 2010
On “the queen of planning.”
That’s what my mom calls me, but not because I’m so good at organization. I’m really, really not. She likes to say that as a kid I always had big plans for projects and they’d never actually happen. This I remember: I’d have the whole idea ready for action, all the materials gathered, then I’d get bored and move on to my next idea.
I’ve gotten a little better over the years. I still have great ideas that never happen, but at least I don’t fool myself into thinking they will. I’m better about being realistic about what will and will not actually be followed through.
I knew this idea would not be followed through from the start, but it was fun to think about. Maybe one day I’ll be browsing blog archives, see this, and be struck with the desire to make PB&J Sticky Buns! I hope this is the case.

It began on April 2nd, which was National peanut butter & jelly day. I had (what I consider) a brilliant idea. I would make sticky bun dough as per Alton Brown’s instructions, except use less sugar (which means less sweet, but also means the yeast will rise faster, which means less sitting and waiting. Theoretically.).
Then, I would have done the filling by brushing butter on both sides of the dough, and spreading peanut butter first, then jelly.
To make the topping, I planned on figuring out some brilliant and creative way water down jelly. I’d start by playing with mixing it with water without heat, and work from there. I’m not sure what would work at the end, but I’d figure something out. Then I would have sliced a banana, and used it to top the buns.
Maybe one day I’ll have a group of people willing to be open minded about weird foods, and the trifecta will be complete, and I’ll be able to make these things come to life. Holler at me if you’re that group of people! I’d be delighted to make you some PB&J sticky buns.
April 3, 2010
On re-using gross bakery cakes that no one wants.
Note: There are a lot of words in this post. Don’t be intimidated–it’s just because you have 2 options.
I can’t take credit for most of this one. Credit belongs to the lovely blogger over at recipe rhapsody who got the idea from Bakerella. She blogged about these little cake pop concoctions and I just HAD to try it. But it’s Passover! Not to fear, ladies and gentlemen. I found a way around it.
Too lazy to click on the link? Basically, what she made were cake pops and cake balls, comprise of crumbled cake from a cake mix, and the frosting that you buy from the store. Mix them up and coat with chocolate. It looks amazing on her site!
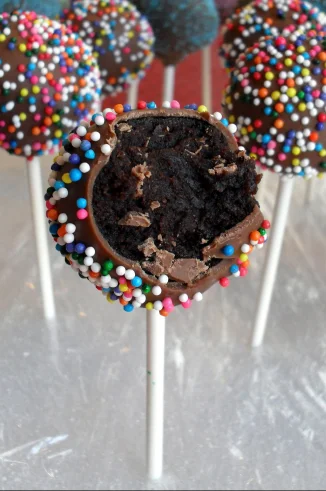
First, a little story:
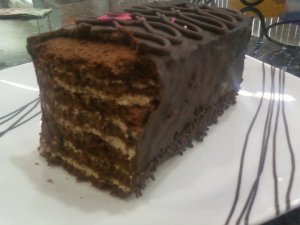
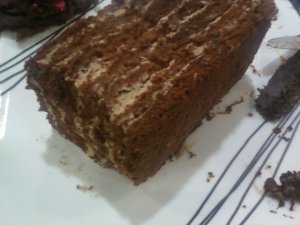
Wednesday was my mom’s birthday, and it was also my sister’s baby shower. I had already made my mom an epic cake for the seder a few days earlier, so I didn’t think about doing it again on her actual birthday. Once the shower had already started, my two sisters and I decided that it was thoughtless of us not to have a cake for our mom, who after all threw a whole baby shower on hardly a week’s notice. So I was assigned the task of driving out to the nearest bakery we knew of that had kosher cakes (about 10-15 min drive). They had two options: one twice the price of the other. I was tempted to get the more expensive one because it was a flourless cake (YUM!). I resisted and instead bought the 7-layer cake (4 layers of passover sponge cake with 3 layers of frosting in between). It was one of those small 8″ rectangle cakes. Let me tell you, it didn’t taste very good.
So now, 2 days after the shower/birthday, we’re left with almost a whole cake that no one wants to eat. Which got me thinking–if the recipe for cake pops calls for cake with a heap of frosting, how is that any different from a pre-assembled cake comprised of cake and frosting? It’s not, that’s how.
Chocolate or Chocolate-Banana Cake Balls:
Please read the whole of the directions before you start. There’s two sets of instructions in there, and you don’t want to start working only to realize you have to start over.
1. Start with a pre-assembled 7-layer cake. If it’s a different cake you have, just make sure it’s got cake and frosting. It might even work if it’s cake, frosting, and something else. It might add a little special kick, so go for it anyway! Shave off whatever is around the cake. You can put it back in if you want later, so don’t throw anything out. If the cake has parts with sprinkles or toppings and parts without like mine did, just try to keep those parts separate.
2. Put the cake into a bowl and mush it up with your hands, Thanksgiving stuffing style. Just keep mushing until it’s cohesive. I suppose this could be done in a food processor, but why make it dirty when hands are so much easier to clean? Just make sure you wash your hands with soap before you start. I found that my cake didn’t have enough frosting in it for the batter to hold together, so I added some of the sprinkle-less frosting that I removed in step 1 (not all of it–that would have been too much).
3a. When you’re done, form it into a ball. Refrigerate for about an hour. More or less.
4a. Remove from fridge. Roll into little balls, the size of which is totally up to you. I did about 1.5″ diameter for what I plan on calling “cake balls,” as opposed to “cake truffles.”
Steps 5+ will be the same for both methods, so see below for what to do now. But first taste it. If it doesn’t taste good, you may want to do the second method which you can read about below.
At this point I tasted it and realize that no amount of mushing could disguise the taste of the passover cake. Your cake might be different. I highly suggest you try it, and see how it tastes. If it’s good, you might want to leave it like that. If not, do this:
3b. Add 1 whole ripe banana. Keep mushing. It’s going to be softer than it was without the banana. Refrigerate for 1-2 hours. Remove from fridge. separate into chunks. Don’t worry about balling them. Put back in fridge for about 45 minutes, more or less depending on how much it warmed while you were working with it during this step.
4b. Remove from fridge, and ball (quickly!).
This is where the two methods converge:
5. Melt 12 oz chocolate in a bowl, carefully. If doing this in the microwave, stop nuking just before it’s all melted together. DO NOT OVERDO THE MICROWAVING.
6. Coat balls with melted chocolate. Sprinkle.
Careful with step 6, especially if you used the banana. I completely messed up a couple of balls until I found a good method.
Be really gentle because the banana makes the balls super soft. I used two spoons to dip the balls into the chocolate, roll them around, then extract them. Don’t stab, hit, or even gently poke the balls with the spoons. Pick them up from underneath ONLY. After you’ve extracted the ball, let it sit on the spoon for a few seconds until most of the excess chocolate has dripped off. Place the ball onto a cookie sheet lined with a sheet of wax paper (don’t forget to use wax paper. It’s very important) by inverting the ball onto the surface, and slowly taking the spoon off. Sprinkle. Don’t try to pick it up, please. Repeat with all balls, and place in fridge, as is. I hope you haven’t tried to pick up any you thought were hardened. If you did, you know that it won’t work.
Leave the coated balls in the fridge for a good 30 minutes just to be sure, by which time you can easily remove them from the paper. I wish someone had told me all that before I started…It would have saved me a big mess.
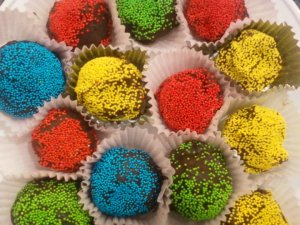
You can tell I started with the yellow, and ended with the blue. I got the hang if it by the end. The blue and green ones are when I finally figured out to use wax paper and refrigerate.
Oh, and in case you’re wondering about what happened with the shower: My mom didn’t even notice I was gone, and was totally surprised that we had come up with a cake out of thin air!
On me, again.
Yes, the power is out. I’m borrowing (not stealing!) my neighbor’s wireless, and what am I doing with it? Why, making a twitter of course!
You can follow me @waytosomewhere
First person to follow me gets my eternal love!
April 2, 2010
On, well, me.
I just updated the “about” page. If you’ve been lurking on this blog, perhaps it will give you an idea of what I’m doing here.
